Creating a fiber-optic star ceiling is an innovative way to transform any room into a celestial haven. Imagine lying in bed and gazing up at a stunning representation of the night sky, complete with twinkling stars, constellations, and the Milky Way. By using fiber-optic technology combined with an actual map of the sky, you can create a breathtaking visual experience right in your home.
This guide will walk you through the steps required to build your fiber-optic star ceiling. We’ll cover everything from gathering materials to installation techniques, ensuring you can achieve a stunning result that brings the cosmos into your living space. By using an accurate map of the sky, your ceiling will not only be beautiful but also educational, allowing you to identify constellations and celestial bodies.
Whether you’re a DIY enthusiast or a beginner looking for a creative project, this fiber-optic star ceiling will amaze you and your guests. Let’s dive into how to bring the beauty of the night sky indoors!
Materials Needed For your Fiber-Optic Star Ceiling
To start your project, you will need the following materials:
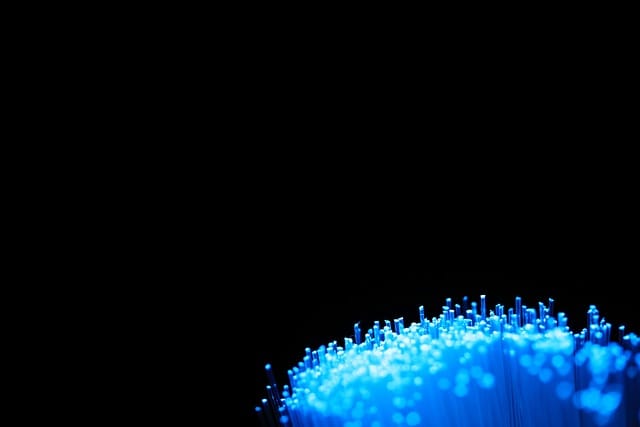
- Fiber Optic Cable: Choose the thickness based on how bright you want your stars to be. A variety of lengths and thicknesses are available.
- Light Source: An LED light source is ideal for illuminating the fiber-optic cables.
- Black Ceiling Tile or Fabric: To create a dark backdrop for the stars.
- Star Map: An actual map of the night sky to guide your layout.
- Drill with a Small Bit: To make holes for the fiber-optic cables.
- Adhesive: To secure the cables in place.
- Scissors: For cutting the fiber-optic cables to the desired lengths.
- Ruler and Pencil: For measuring and marking where to drill.
Step-by-Step Instructions
1. Prepare Your Space
- Choose the room where you want to create your fiber-optic star ceiling. A bedroom, home theater, or playroom can be ideal.
- Clear the area of furniture and cover the floor with a drop cloth to protect it during installation.
2. Design Your Layout
- Use your star map to outline the constellations and stars you want to feature on your ceiling.
- Mark the positions of the stars on the ceiling using a pencil. You can create a random star pattern or replicate actual constellations.
3. Drill Holes for the Fiber Optic Cables
- Using a drill with a small bit, carefully drill holes where you marked the stars. The size of the hole should accommodate the thickness of the fiber-optic cable you’re using.
- Space the holes appropriately to ensure a natural look.
4. Cut the Fiber Optic Cables
- Cut the fiber-optic cables to varying lengths. Longer cables can represent larger stars, while shorter cables can represent smaller stars.
- Ensure you have enough length to reach your light source.
5. Insert Fiber Optic Cables
- Insert the ends of the fiber-optic cables into the drilled holes. Secure them in place using adhesive if necessary.
- Leave some length of the cables exposed above the ceiling for optimal light transmission.
6. Install the Light Source
- Place the LED light source in a central location on the ceiling or in an attic space, depending on the layout.
- Connect the fiber-optic cables to the light source. The light will travel through the cables, illuminating the ends to create the effect of stars.
7. Create the Backdrop
- Cover the entire ceiling with black fabric or black ceiling tiles to enhance the starry effect. This backdrop will absorb any stray light, making the stars appear more vibrant.
- Ensure that the fabric is taut and secure to avoid sagging.
8. Test Your Installation
- Turn on the LED light source to test your star ceiling. Adjust the length of the fiber-optic cables as needed for brightness.
- Make any necessary adjustments to the layout or light placement to achieve your desired effect.
Maintenance and Care
Once your fiber-optic star ceiling is complete, it’s important to maintain it for the best results. Here are some tips:
- Dust Regularly: Use a soft cloth or duster to remove any dust from the fiber-optic cables and the surrounding area.
- Check Light Source: Regularly check the LED light source to ensure it’s functioning correctly. Replace bulbs as necessary.
- Adjust Cables: If you notice dimming in certain areas, check the fiber-optic cables to ensure they are not bent or obstructed.
Applications and Benefits
Creating a fiber-optic star ceiling is not just a fun DIY project; it offers numerous benefits and applications:
- Educational Tool: This project can serve as a great educational resource for children and adults alike. It can help teach about constellations, stars, and astronomy.
- Relaxation Space: A starry ceiling can provide a calming atmosphere, making it ideal for relaxation or meditation spaces.
- Unique Home Decor: Impress your guests with a unique and personalized design feature in your home.
Real-World Inspiration
Many homeowners and businesses have implemented fiber-optic ceilings for various purposes. Some notable applications include:
- Home Theaters: Enhance the movie-watching experience with a starry ceiling.
- Children’s Bedrooms: Create a whimsical and imaginative space for kids.
- Restaurants and Cafes: Many establishments use star ceilings to set a romantic or cozy ambiance.
Troubleshooting Common Issues
While creating a fiber-optic star ceiling can be relatively straightforward, you may encounter some common issues:
- Dim Stars: If some stars appear dim, ensure that the fiber-optic cables are cut to the correct length and that they are properly connected to the light source.
- Loose Cables: If cables are falling out of their holes, use additional adhesive to secure them.
- Uneven Lighting: Adjust the placement of the light source and the angles of the cables to achieve even illumination.
Creative Ideas for Customization
Personalizing your fiber-optic star ceiling can make the project even more enjoyable. Here are some creative ideas to consider:
1. Colored Fiber Optic Cables
Use colored fiber-optic cables to create a more vibrant display. This can represent different star types, such as red for red giants and blue for hot stars.
2. Twinkling Effect
Incorporate a twinkling effect by using a light source with a dimmer or a flickering LED. This will mimic the natural twinkle of stars in the night sky.
3. Incorporate Planets
Consider adding representations of planets using painted styrofoam balls or other materials. Position them at strategic points on your ceiling to enhance the celestial theme.
4. Glow-in-the-Dark Paint
Use glow-in-the-dark paint on areas surrounding your fiber-optic stars. This will provide an additional glow during the night, enhancing the overall effect.
5. Create Constellation Outlines
Paint or use adhesive vinyl to create outlines of constellations on your ceiling. This will provide a guide for viewers to identify stars and their patterns.
Incorporating Technology
To further enhance your fiber-optic star ceiling experience, consider integrating smart home technology:
1. Smart Lighting
Use smart LED lights that can change color and intensity based on your preferences. You can control them using a smartphone app or voice commands.
2. Automated Timers
Set up timers for your lighting system to mimic natural day and night cycles. This can enhance the relaxing atmosphere in your room.
3. Music Integration
Consider installing speakers that can play soothing music or nature sounds in tandem with your star ceiling. This multi-sensory experience can further enhance relaxation.
Educational Aspects of Your Star Ceiling
Not only is a fiber-optic star ceiling a stunning design feature, but it can also be a valuable educational tool:
1. Stargazing Sessions
Host stargazing sessions with friends and family. Use your star ceiling as a starting point to teach about astronomy and the stories behind the constellations.
2. Interactive Learning
Create interactive learning experiences for children. Use the star map to engage kids in identifying stars and learning about their characteristics.
3. Create a Star Journal
Encourage everyone to keep a star journal where they can note observations and thoughts during stargazing sessions. This can inspire a love for astronomy and science.
Celebrating Milestones with Your Star Ceiling
Your fiber-optic star ceiling can also be a backdrop for special celebrations:
1. Movie Nights
Transform movie nights into special experiences by enjoying films under a starry ceiling. It creates a cozy and magical ambiance.
2. Themed Parties
Host themed parties such as space-themed birthdays or celestial celebrations. The star ceiling can be a focal point for decorations and activities.
3. Romantic Dinners
Set up a romantic dinner under the stars. Dim the lights, play soft music, and enjoy a special meal surrounded by the beauty of your DIY creation.
Inspiration from Nature
To enhance the authenticity of your fiber-optic star ceiling, consider drawing inspiration from real astronomical phenomena:
1. Milky Way Representation
Use a larger cluster of fiber-optic cables to represent the Milky Way. This can be done by placing them in a band across the ceiling to mimic the galaxy’s appearance.
2. Aurora Borealis Effect
Create a soft, glowing effect using colored fiber optics to mimic the Aurora Borealis. This can add an enchanting touch to your star ceiling.
3. Shooting Stars
Consider adding a few longer fiber-optic cables in a diagonal pattern to simulate shooting stars. This can create an interactive element for viewers.
Sharing Your Creation
Once you’ve completed your fiber-optic star ceiling, consider sharing your creation:
1. Social Media
Post photos and videos on social media platforms. Use hashtags related to DIY projects, home decor, and astronomy to reach a broader audience.
2. DIY Communities
Join online DIY communities or forums to share your experience and learn from others. You can find support, advice, and inspiration from fellow enthusiasts.
3. Workshops
Host a workshop to teach others how to create their own fiber-optic star ceilings. Sharing your skills and knowledge can be a rewarding experience.
Conclusion
Building a fiber-optic star ceiling using an actual map of the sky is an engaging and rewarding project that adds a touch of the cosmos to your home. By following this guide, you can create a stunning display that not only enhances your living space but also serves as a captivating educational tool.
This project allows for a great deal of creativity, whether you choose to replicate actual constellations or design your unique star patterns. The end result is a beautiful, twinkling ceiling that can provide relaxation, inspiration, and a deeper appreciation for the wonders of the universe.
By harnessing the power of fiber optics and your creativity, you can create a stunning celestial display right in your home. So gather your materials, follow the steps outlined in this guide, and enjoy the beauty of your very own starry ceiling.
For additional inspiration and materials, consider visiting the following external resources: