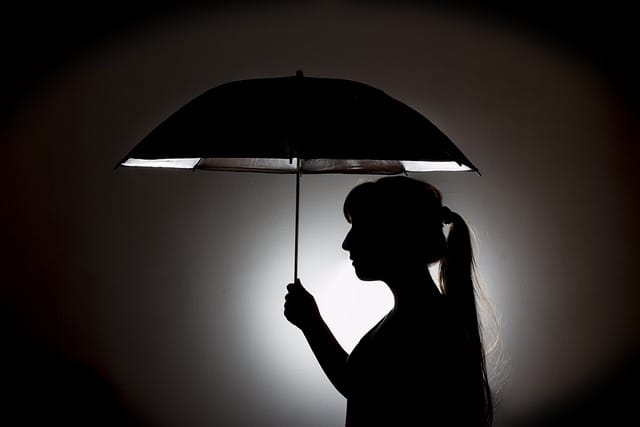
Studio photography requires a delicate balance of lighting and creativity. While many photographers focus on high-end cameras and lenses, lighting can make or break an image. Professional lighting equipment like softboxes, umbrellas, and beauty dishes are often expensive, especially for photographers just starting out. Enter DIY light modifier solutions, where you can craft your light modifiers with everyday materials and get professional-looking results on a budget.
The beauty of DIY light modifiers lies in their flexibility, affordability, and customizability. From simple diffusion panels to more advanced light control tools like grids and snoots, you can craft these tools for a fraction of the cost while still achieving the effects you want. In this guide, we will walk you through various DIY light modifier projects, from softboxes to beauty dishes, reflectors, and grids. We’ll also discuss the science behind light shaping and how to effectively use your DIY tools for the best results in studio photography.
Whether you’re a professional photographer looking to enhance your lighting setup or an amateur experimenting with studio lighting for the first time, this guide will provide practical, cost-effective solutions. DIY light modifier solutions can dramatically improve the quality of your photographs and help you develop your style. In this guide, you’ll learn how to craft these tools, where to source materials, and how to combine them for professional results. Let’s dive into the world of DIY photography lighting and unlock the potential of cost-effective, homemade solutions.
Understanding the Basics of Lighting in Photography
Before we dive into the specifics of creating DIY light modifiers, it’s crucial to understand the fundamentals of lighting in photography. Light, after all, is the essence of photography. The word itself comes from the Greek words “photos,” meaning light, and “graphein,” meaning to draw or write. So, in essence, photography is the art of drawing with light.
The Role of Light in Photography
Light shapes how an image looks, from its brightness and contrast to its mood and clarity. Without proper lighting, even the best camera won’t be able to capture an image that stands out. In studio photography, controlling light becomes essential, as you’re often working in controlled environments where natural light isn’t a factor.
Good lighting helps you achieve:
- Exposure and clarity: Proper lighting ensures that your subject is neither too dark nor too bright.
- Mood: Bright, even lighting can create a cheerful, lighthearted mood, while dim, focused lighting can create mystery and drama.
- Texture and detail: Lighting can enhance the texture and detail of your subject, particularly in product photography (www.productphotography.com).
- Dimension and depth: The right lighting setup can add dimension and depth, giving a three-dimensional feel to your images.
Types of Lighting in Photography
Understanding the various types of lighting used in photography will help you better design your DIY light modifiers. Here’s a breakdown of the most common lighting types:
Natural Light
Natural light, as the name suggests, is sunlight. It is free, abundant, and can be used in various ways for both outdoor and indoor photography. However, the quality of natural light is unpredictable and changes throughout the day.
Artificial Light
Artificial light refers to any light source created by human intervention, such as flashguns, LEDs, or continuous lights. Artificial light is more controllable than natural light, making it a preferred choice for studio photography (www.studiophotography.com).
Hard Light vs. Soft Light
- Hard light is direct, unfiltered light that creates sharp shadows and highlights. It is often used for dramatic effects.
- Soft light is diffused light that spreads over a larger area, reducing harsh shadows and creating a more even illumination.
Key Light
The key light is the primary source of light in a scene. It is responsible for shaping the subject and giving the image its overall exposure.
Fill Light
A fill light is used to fill in shadows created by the key light, ensuring that the image doesn’t have too much contrast between light and dark areas.
Back Light (or Rim Light)
A backlight is placed behind the subject, highlighting the edges and creating separation between the subject and the background. It adds depth to the image.
Essential DIY Light Modifiers: Advanced Techniques
Now that we have a basic understanding of lighting, let’s explore advanced DIY light modifiers. These tools will help you control and manipulate your lighting in a studio setting to get the desired effect.
DIY Light Modifier: Diffusion Panel
A diffusion panel is an essential light modifier that helps to soften the light, spreading it over a larger surface to reduce harsh shadows and create a more flattering appearance.
Materials Needed:
- A large frame (can be made from PVC pipes or a large hula hoop)
- White fabric (like a shower curtain, tracing paper, or diffusion paper)
- Clips or tape
How to Make It:
- Assemble the Frame: Create a square or circular frame using PVC pipes or a large hula hoop.
- Attach the Fabric: Stretch the white fabric over the frame and secure it with tape or clips.
- Position the Panel: Place the diffusion panel between the light source and your subject to soften the light.
DIY Softbox
A softbox diffuses the light, making it softer and reducing shadows. Here’s how to create one with simple materials.
Materials Needed:
- A cardboard box
- Aluminum foil
- White diffusion fabric
- Tape or glue
- A light source (flash or continuous light)
How to Make It:
- Prepare the Box: Cut out one side of the cardboard box to create an opening for the light.
- Line the Interior: Cover the inside of the box with aluminum foil to reflect the light.
- Attach Diffusion Fabric: Tape the diffusion fabric over the opening.
- Position the Light: Place your light source inside the box and point it at your subject.
DIY Grid Modifier
Grids are essential for directing light, focusing it into a beam to create dramatic effects. They’re often used in portrait photography (www.portraitphotography.com) and product photography to highlight specific parts of the subject.
Materials Needed:
- Black straws
- Cardboard
- Glue or tape
- Scissors
How to Make It:
- Prepare the Straws: Cut the black straws into equal lengths.
- Assemble the Grid: Arrange the straws into a grid pattern on the cardboard.
- Attach to the Light Source: Glue or tape the grid onto your light source.
This DIY grid modifier allows you to control the direction of the light, creating a spotlight effect.
DIY Beauty Dish
A beauty dish is a favorite among portrait photographers because it offers a combination of soft and focused light. Here’s how to create your own beauty dish.
Materials Needed:
- A large aluminum dish or bowl
- CD spindle cover
- Glue
- Light stand
How to Make It:
- Drill a Hole: Drill a hole in the center of the aluminum dish.
- Mount the Light Source: Place your light source through the hole.
- Attach the CD Spindle Cover: Glue the CD spindle cover over the light source to diffuse the light into the dish.
The DIY beauty dish offers flattering light for portrait photography (www.portraitphotography.com), particularly for close-up shots.
DIY Reflectors
Reflectors bounce light back onto your subject, filling in shadows and highlighting details. Here’s how to make your own reflectors.
Materials Needed:
- Large cardboard or foam board
- Aluminum foil
- White fabric (optional)
- Tape
How to Make It:
- Cut the Cardboard: Cut the cardboard or foam board into the desired shape and size.
- Cover with Foil: Attach aluminum foil to one side of the board for a reflective surface.
- Optional: White Side: Attach white fabric to the other side of the board for a softer reflection.
Reflectors are easy to move around and can be used in various lighting setups, from portrait photography to product photography (www.productphotography.com).
Practical Applications of DIY Light Modifiers
Portrait Photography
DIY light modifiers like softboxes, beauty dishes, and reflectors are essential for portrait photography. Soft light creates flattering results, reducing harsh shadows and evening out skin tones. A reflector can be used to fill in shadows under the eyes or chin, while a DIY beauty dish provides the perfect amount of contrast for fashion or beauty shots.
Product Photography
In product photography, lighting is critical to showcasing the details and features of the product. DIY grids and reflectors can highlight specific parts of the product, such as textures or materials, while diffusion panels and softboxes create even lighting that brings out the colors and shapes.
Food Photography
For food photographers, lighting plays a crucial role in making dishes look appetizing. Soft, diffused light works best for food photography, as it mimics natural light and highlights the textures of the food. DIY reflectors can bounce light back onto the dish, adding dimension and depth.
Conclusion
DIY light modifier solutions are a game-changer for photographers looking to enhance their studio lighting without spending a fortune. These affordable, customizable tools can be made with everyday materials, offering a professional look for portraits, products, and other types of photography.
By understanding how light works and how to control it, you can craft your light modifiers to suit your needs. The key is experimentation — don’t be afraid to try different materials, techniques, and lighting setups to find what works best for your photography style.
Creating your own light modifiers not only saves you money but also allows for greater creative control in your photography. You’ll be able to fine-tune the lighting to suit your subject, whether it’s a person, product, or dish. With a little creativity, DIY solutions can help you achieve stunning, professional-quality images.
So, go ahead and explore the endless possibilities that DIY light modifiers offer. Your photography will thank you for it.


