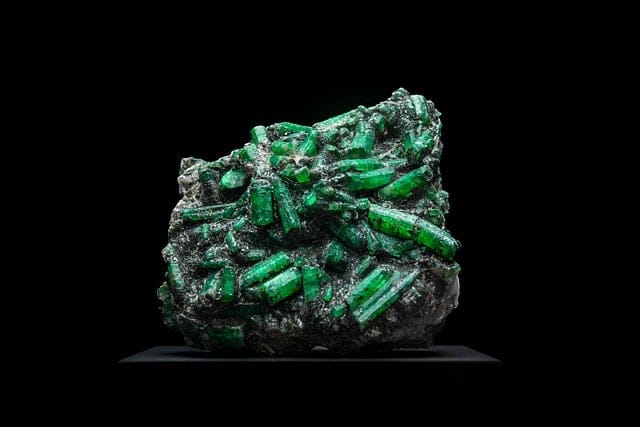
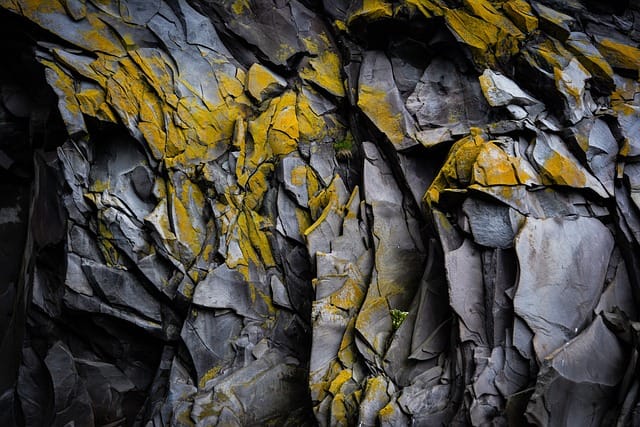
Identifying rocks and minerals is a fascinating and educational pursuit that opens up the world of geology to enthusiasts and professionals alike. Whether you are an amateur rock hound, a student studying earth sciences, or just someone curious about the natural world, understanding the basics of rock and mineral identification can enrich your appreciation of the Earth’s resources and beauty. Geologists, who are trained to analyze and classify geological materials, use a systematic approach to identify rocks and minerals that relies on key characteristics, properties, and tools.
Understanding Rocks and Minerals
To identify rocks and minerals accurately, it is crucial to understand their fundamental characteristics and classification.
What Are Rocks?
Rocks are classified into three primary types:
- Igneous Rocks: Formed from the cooling and solidification of molten material (magma or lava). Common examples include granite and basalt.
- Sedimentary Rocks: Created from the accumulation and compaction of mineral and organic particles, often found in layers. Examples include limestone and sandstone.
- Metamorphic Rocks: Formed from the alteration of existing rocks due to heat, pressure, and chemically active fluids. Examples include schist and marble.
What Are Minerals?
Minerals are naturally occurring, inorganic solids with a defined chemical composition and crystalline structure. Common characteristics of minerals include:
- Crystal Form: The external shape of the mineral, which reflects its internal atomic structure.
- Color: The visible hue of the mineral, though it can vary due to impurities.
- Luster: The way light interacts with the surface of the mineral, categorized as metallic or non-metallic.
- Hardness: A measure of a mineral’s resistance to scratching, quantified using Mohs scale, which ranges from 1 (talc) to 10 (diamond).
Key Techniques to Identify Rocks and Minerals
Geologists employ various techniques to identify rocks and minerals accurately. Here are some key methods to consider:
1. Visual Inspection
Begin by examining your specimen visually. Consider the following characteristics:
- Color: Note the primary color and any variations or banding.
- Luster: Determine if the surface is shiny (metallic) or dull (non-metallic).
- Grain Size: Observe the texture; is it coarse, fine, or glassy?
- Crystal Structure: If applicable, identify the shape of the crystals.
Visual inspection is often the first step to identify rocks and minerals, giving you immediate clues about the specimen’s identity.
2. Hardness Test
Use the Mohs scale of mineral hardness to test your specimen’s hardness. The scale ranges from talc (1) to diamond (10). Here’s a basic outline of how to conduct the hardness test:
- Fingernail (hardness 2.5): Can it be scratched by a fingernail?
- Copper Penny (hardness 3.5): Can it be scratched by a penny?
- Glass (hardness 5.5): Can it scratch glass?
- Steel File (hardness 6.5): Can it be scratched by a steel file?
The hardness test is a simple yet effective way to narrow down mineral possibilities and to identify rocks and minerals.
3. Streak Test
The streak test involves rubbing the mineral across a porcelain plate to reveal the color of its powder. The streak color can provide valuable identification clues, as it is often more consistent than the color of the mineral itself. Many minerals have distinctive streak colors that can help you identify rocks and minerals effectively.
4. Cleavage and Fracture
Observe how the mineral breaks:
- Cleavage: Indicates the tendency of a mineral to break along flat planes of weakness.
- Fracture: Refers to irregular breakage patterns. Common types include conchoidal (shell-like), fibrous, and uneven.
Recognizing cleavage and fracture patterns is crucial in the process to identify rocks and minerals.
5. Acid Test
For certain carbonate minerals, such as calcite, a drop of hydrochloric acid (HCl) can help identify rocks and minerals. If the mineral fizzes, it likely contains carbonate. This test can quickly differentiate between carbonate minerals and others.
Tools for Identification
Equipping yourself with the right tools can enhance your rock and mineral identification process. Here are some essential tools to help identify rocks and minerals:
- Hand Lens: A magnifying glass for close examination of mineral details.
- Mohs Hardness Kit: A set of minerals with known hardness to test your specimen.
- Streak Plate: A piece of unglazed porcelain used for streak tests.
- Field Guide: A comprehensive guidebook for identifying local rocks and minerals.
- Geologist’s Hammer: Useful for breaking rocks and collecting samples safely.
Having the right tools at your disposal can significantly improve your ability to identify rocks and minerals effectively.
Using Online Resources to Identify Rocks and Minerals
In addition to hands-on techniques and tools, the internet is an invaluable resource for rock and mineral identification. Here are ways to utilize online platforms to identify rocks and minerals:
- Identification Apps: Apps like Rock Identifier or Mineral Identification can help you identify your specimen by answering questions about its characteristics. Many apps use visual recognition technology to match your specimen to known rocks and minerals.
- Online Communities: Joining forums or social media groups dedicated to geology can provide support and advice from fellow enthusiasts. Engaging with the community can lead to valuable insights and resources for identifying rocks and minerals.
- YouTube Tutorials: Many geologists and educators share identification techniques and tips through video content, providing visual demonstrations to enhance your learning experience.
Fieldwork and Collecting Specimens
Exploring the outdoors is a fantastic way to practice your identification skills. Here are tips for successful fieldwork to identify rocks and minerals:
- Choose Your Location Wisely: Research areas known for interesting geological formations or mineral deposits. Local quarries, parks, and natural reserves are great places to start.
- Bring the Right Gear: Carry essential tools, safety equipment, and a field guide to assist with identification on-site. Your toolkit should include the tools mentioned earlier to help you identify rocks and minerals accurately.
- Document Your Findings: Take notes and photos of specimens in their natural setting, including context like rock layers and surrounding vegetation. This documentation can aid in identification and study.
Fieldwork is an exciting opportunity to apply your skills and learn more about how to identify rocks and minerals in their natural environment.
Understanding Geological Maps
Geological maps are powerful tools for geologists and enthusiasts alike. They provide information about the distribution, nature, and age of rock formations in a given area. Familiarizing yourself with these maps can significantly enhance your rock-hunting endeavors and help you identify rocks and minerals.
Reading Geological Maps
Geological maps use symbols and colors to represent different rock types and geological features. Here’s how to interpret them:
- Legend: The legend explains the symbols used on the map. Different colors usually represent different geological periods.
- Scale: The scale indicates the ratio between distances on the map and actual distances in the field.
- Contour Lines: These lines connect points of equal elevation and can help you understand the topography of the area.
Understanding geological maps can guide you to the best locations for collecting specimens and ultimately help you identify rocks and minerals in your area.
Exploring Local Geological Features
Visit local geological sites and formations, such as national parks or geological reserves. Researching geological features unique to your area can provide context for your rock and mineral hunts. Observing the characteristics of local geology will enhance your ability to identify rocks and minerals that you may encounter.
Advanced Identification Techniques
Once you’ve mastered the basics, consider exploring advanced identification techniques used by professional geologists to identify rocks and minerals:
1. Thin Section Analysis
This involves slicing a rock sample into thin sections for examination under a polarizing microscope. This method provides insight into the mineral composition and textures, making it easier to identify rocks and minerals with complex structures.
2. X-ray Diffraction (XRD)
A laboratory technique that identifies minerals based on their crystal structure. XRD is used for detailed analysis and research. It can provide precise identification of minerals that are difficult to recognize through standard field techniques, making it invaluable in advanced geology.
3. Scanning Electron Microscopy (SEM)
This advanced technique offers high-resolution images of mineral surfaces and can provide elemental analysis. SEM is useful for scientists conducting detailed studies of mineral properties and behaviors, allowing them to identify rocks and minerals at a microscopic level.
Collecting and Preserving Samples
Collecting rocks and minerals responsibly is essential for both conservation and scientific integrity. Here are best practices for those who want to identify rocks and minerals:
Ethical Collecting
Always seek permission when collecting samples from private land and adhere to local regulations when collecting in public areas. Responsible collecting ensures that future generations can also enjoy the hobby of identifying rocks and minerals.
Proper Documentation
Keep a detailed record of where and when each specimen was collected. This information is invaluable for future identification and research. Include:
- Location: GPS coordinates or a detailed description.
- Date: When you collected the specimen.
- Environment: Describe the surroundings, including soil type and vegetation.
This documentation aids in the process to identify rocks and minerals accurately and provides context for each specimen.
Preservation Techniques
Preserving your specimens is crucial for maintaining their integrity. Here are some techniques:
- Cleaning: Use water and a soft brush to remove dirt. Avoid harsh chemicals that could damage the specimen.
- Display: Consider using display cases or shadow boxes to showcase your collection while protecting it from dust and damage.
- Storage: Store specimens in a cool, dry place away from direct sunlight to prevent fading or deterioration.
Conclusion
In conclusion, learning to identify rocks and minerals is an engaging and rewarding endeavor that connects you with the Earth and its natural history. By understanding the fundamental characteristics of rocks and minerals, utilizing various identification techniques, and employing the right tools, you can develop a keen eye for geological materials. As you explore the outdoors and expand your knowledge through online resources and communities, your skills will continue to grow.
Embrace the adventure of rock and mineral identification, and remember that practice is key. Whether you are collecting specimens, participating in field trips, or studying geological formations, each experience will enhance your understanding and appreciation of the fascinating world beneath our feet. With patience and curiosity, you will soon become adept at identifying rocks and minerals, unlocking the secrets of the Earth one specimen at a time.


