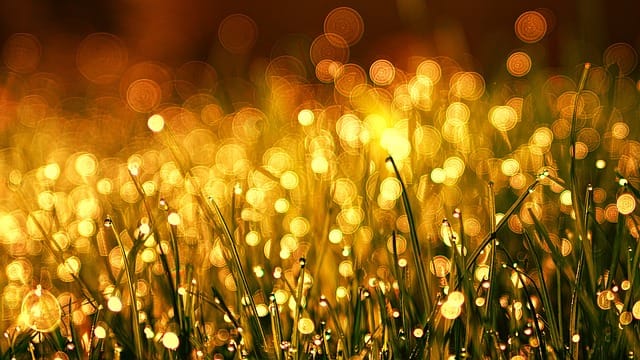
Golden hour photography is a beloved style among photographers for its ability to transform ordinary scenes into something truly magical. The golden hour occurs during the first hour after sunrise and the last hour before sunset, when the sun is low in the sky and casts a warm, golden hue. This soft, directional light creates long shadows, enhances natural colors, and provides a flattering glow, making it the perfect time for capturing everything from landscapes to portraits.
In this comprehensive guide, we will explore the fundamentals and techniques of golden hour photography to help you make the most of this beautiful time of day. From understanding the science behind the light to tips on composition and camera settings, this article will provide everything you need to create stunning golden hour images.
What is Golden Hour Photography?
Before we dive into the techniques, let’s define what golden hour photography actually means. The “golden hour” refers to the period shortly after sunrise or just before sunset when the sun is low on the horizon, producing a warm, golden light. This light is softer and more diffused compared to the harsh midday sun, which makes it ideal for creating dramatic, yet flattering images.
Golden hour provides the perfect conditions for photographers who want to capture natural lighting that enhances textures, creates depth, and adds a warm glow to subjects. Whether you’re shooting portraits, landscapes, or wildlife, golden hour photography allows you to capture light at its best.
1. Timing is Key in Golden Hour Photography
The most important aspect of golden hour photography is understanding the timing. The golden hour is a relatively short window of time that varies depending on your location and the season. In order to make the most of this time, it’s crucial to be prepared and know exactly when the golden hour occurs in your area.
How to Determine the Golden Hour
The golden hour happens twice a day—shortly after sunrise and just before sunset. However, the duration of the golden hour depends on your geographic location and the time of year. In general, the golden hour lasts about an hour, but in some places, it can be much shorter or longer depending on how close you are to the equator.
You can use apps like Golden Hour or Photographer’s Ephemeris to calculate the exact timing of the golden hour in your area. Planning ahead is essential because missing the golden hour by even 15 minutes can significantly affect the quality of light in your photos.
2. Best Camera Settings for Golden Hour Photography
Achieving the perfect exposure in golden hour photography can be tricky because of the constantly changing light conditions. As the sun rises or sets, the intensity of light can shift rapidly, so it’s important to know which camera settings to use for the best results.
Aperture
Using a wide aperture (low f-stop number) like f/1.8 or f/2.8 allows more light into the camera, which is beneficial during the golden hour when natural light is soft and diffused. A wide aperture also creates a shallow depth of field, which helps separate your subject from the background, resulting in beautiful bokeh effects.
Shutter Speed
During the golden hour, the light is soft, but it fades quickly, especially during sunset. You’ll need to adjust your shutter speed accordingly to prevent underexposure. A faster shutter speed is ideal for freezing motion, while a slower shutter speed can be used creatively to introduce motion blur, especially for landscapes or moving subjects like water.
ISO
In golden hour photography, keeping your ISO as low as possible (ISO 100 or 200) is recommended to avoid introducing noise or grain into your images. Since the light during golden hour is typically ample, you shouldn’t need to raise your ISO too much unless you’re shooting in extremely low-light conditions at the end of the golden hour.
3. Composition Techniques for Golden Hour Photography
While the light during the golden hour can transform your photos, composition remains equally important. Using strong compositional techniques can elevate your golden hour photography and make the most of the stunning lighting conditions.
Rule of Thirds
The rule of thirds is a classic compositional technique that works beautifully in golden hour photography. By dividing your frame into nine equal parts with two horizontal and two vertical lines, you can place your subject at one of the intersection points to create a more balanced and visually appealing image. The soft light of golden hour can help emphasize this composition by drawing attention to your subject.
Leading Lines
Golden hour’s long shadows and directional light create a natural opportunity to incorporate leading lines into your composition. Look for elements like roads, rivers, or even the shadows themselves to guide the viewer’s eye through the frame and toward your subject.
Symmetry and Reflections
During the golden hour, reflections on water or other shiny surfaces can create stunning symmetrical compositions. This is especially effective in landscape photography, where the reflection of the sky during sunrise or sunset can add depth and dimension to the image.
4. Natural Light to Enhance Portraits in Golden Hour Photography
Golden hour is widely considered the best time to capture portrait photography due to the flattering quality of light it provides. Soft, warm light can enhance skin tones and reduce harsh shadows, making your subject look radiant.
Backlighting Your Subject
One of the most popular techniques in golden hour photography is backlighting, where the light source is positioned behind your subject. This creates a beautiful glow around the subject’s hair and edges, adding a soft halo effect that enhances the mood of the portrait. When using backlighting, it’s important to meter for your subject’s face to ensure proper exposure.
Side Lighting for Depth and Texture
Side lighting during the golden hour can also be used to great effect. This type of lighting adds depth and dimension to your portraits by casting long shadows on one side of the face while keeping the other side illuminated. This dramatic effect is ideal for creating more emotional and intense portraits.
5. Capture Stunning Landscapes with Golden Hour Photography
Golden hour is a dream for landscape photographers. The warm, golden light can turn even the most ordinary landscapes into breathtaking scenes. The soft lighting creates long shadows that add texture and depth to your images, while the warm colors enhance the natural beauty of the environment.
Focus on Foreground Elements
In landscape golden hour photography, incorporating strong foreground elements can add interest and depth to your composition. Look for rocks, plants, or water features that can lead the viewer’s eye into the scene and towards the background.
Include the Sky for Dramatic Effects
The sky is often one of the most compelling features of a golden hour landscape. Whether you’re capturing the soft hues of a sunrise or the fiery colors of a sunset, including a portion of the sky in your composition can enhance the overall mood and impact of your image.
6. Play with Silhouettes for Dramatic Golden Hour Photography
Silhouettes are a popular and effective way to create striking images during the golden hour. By positioning your subject between the camera and the light source, you can create a dramatic silhouette that emphasizes shape and form while allowing the golden light to provide a beautiful backdrop.
How to Create Silhouettes
To capture a silhouette, simply expose for the bright background (the sky or the sun) rather than your subject. This will cause your subject to appear dark and shadowy, while the background retains its warm glow. Silhouettes work well with simple, recognizable shapes, such as a person standing or a tree.
7. Adjust White Balance for Accurate Colors in Golden Hour Photography
While the natural warmth of golden hour light can be stunning, you’ll want to pay attention to your white balance settings to ensure the colors in your image are true to life. In golden hour photography, your camera may interpret the warm tones differently depending on the settings you use.
Use Daylight or Cloudy White Balance
The Daylight or Cloudy white balance presets are generally the best options for golden hour photography. These presets help maintain the natural warmth of the light without introducing unwanted color casts. If you find the colors are too warm, you can always adjust the white balance later in post-processing, especially if you’re shooting in RAW format.
8. Use a Tripod for Sharp Images in Golden Hour Photography
As the light fades during the golden hour, you may need to slow down your shutter speed to maintain proper exposure. A tripod is essential for ensuring your camera stays stable and your images remain sharp, especially when shooting at slower shutter speeds.
Benefits of Using a Tripod
A tripod allows you to take your time composing the perfect shot without worrying about camera shake. It also enables you to experiment with longer exposures, which can be particularly effective in golden hour photography when capturing moving elements like water, clouds, or people.
9. Post-Processing Tips for Golden Hour Photography
While golden hour photography often results in beautifully lit images straight out of the camera, a little post-processing can help enhance the final result. Editing software like Adobe Lightroom or Photoshop can be used to fine-tune exposure, contrast, and color balance.
Enhance the Warmth
One of the main characteristics of golden hour photography is its warm tones. In post-processing, you can accentuate these warm tones by adjusting the white balance or temperature slider. This can help bring out the rich golden hues that make golden hour images so captivating.
Adjust Shadows and Highlights
Golden hour often creates high-contrast scenes with bright highlights and deep shadows. In post-processing, you can recover some detail from the shadows without losing the overall mood of the image. Use the shadows and highlights sliders to achieve a balanced exposure while maintaining the depth and texture of the image.
10. Experiment with Different Perspectives in Golden Hour Photography
The unique lighting conditions of the golden hour offer endless creative possibilities for photographers. One way to elevate your golden hour photography is to experiment with different angles and perspectives. Try shooting from a low angle to capture the sun’s rays filtering through trees or flowers, or shoot directly into the sun to create lens flares and other artistic effects.
Be Bold with Your Creativity
Don’t be afraid to break the traditional rules of photography during the golden hour. The soft, diffused light allows for more experimentation without the risk of overexposing or harsh shadows. This is the perfect time to play with compositions, angles, and creative effects like intentional motion blur or double exposure.
Conclusion: Unlock the Magic of Golden Hour Photography
Golden hour photography is a beautiful and rewarding style that allows photographers to capture scenes bathed in warm, golden light. By understanding the key principles of timing, composition, and camera settings, you can make the most of this fleeting period to create stunning images that evoke emotion and beauty. Whether you’re photographing portraits, landscapes, or silhouettes, the golden hour provides an ideal opportunity to experiment with light and shadow, resulting in timeless, captivating images.