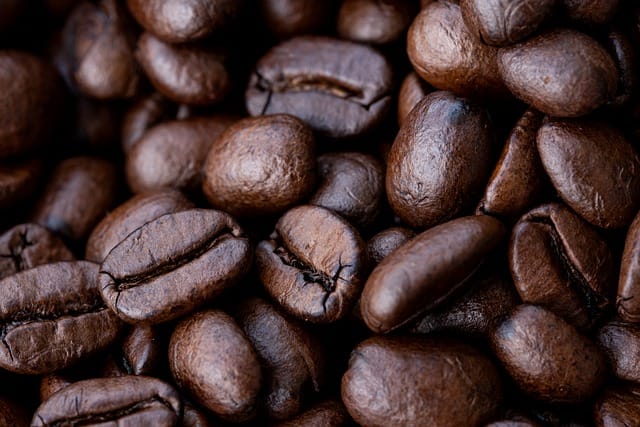
Starting a coffee compost bin can be one of the best decisions you make for your garden and the environment. Coffee grounds are not only a common kitchen waste but also an incredibly nutrient-rich addition to your compost. They provide essential nitrogen, which is vital for healthy plant growth. A well-maintained coffee compost bin can significantly reduce waste while enriching your garden soil, making it more fertile and conducive to growth.
In this comprehensive guide, we’ll delve into everything you need to know about creating, maintaining, and maximizing the benefits of a coffee compost bin. Whether you’re an avid gardener or just starting, understanding the ins and outs of composting with coffee can lead to a more sustainable lifestyle. From the initial setup to troubleshooting common problems, our tips will help you create a thriving compost ecosystem that benefits your plants and the planet.
Why Start a Coffee Compost Bin?
Creating a coffee compost bin is an excellent way to make use of the coffee grounds that would otherwise end up in a landfill. Not only does this practice reduce waste, but it also has numerous environmental benefits. Here are some compelling reasons to start a coffee compost bin:
1. Nutrient-Rich Soil Amendment
Coffee grounds are rich in nitrogen, which is essential for plant growth. When added to compost, coffee grounds break down and release nutrients into the soil. This can lead to improved plant health and increased yields in your garden. Incorporating a coffee compost bin into your gardening routine means you’ll be feeding your plants high-quality, organic nutrients.
2. Environmental Impact
Composting coffee grounds helps reduce landfill waste. Approximately 20 million pounds of coffee are thrown away daily in the United States alone. By creating a coffee compost bin, you can divert a significant amount of waste from landfills, contributing to a healthier planet. Moreover, composting reduces methane emissions associated with organic waste decomposition in landfills.
3. Improved Soil Structure
Adding compost from your coffee compost bin can enhance soil structure by increasing aeration and moisture retention. This is particularly beneficial for sandy or clay soils, making them more workable and productive. Well-composted materials improve drainage while retaining moisture, creating a more hospitable environment for plants.
Setting Up Your Coffee Compost Bin
Setting up a coffee compost bin is relatively straightforward. Here’s a detailed guide on how to get started:
Choosing the Right Location
Selecting an appropriate location for your coffee compost bin is crucial. Here are some tips:
- Accessibility: Place your bin close to your kitchen for easy access to coffee grounds and other kitchen scraps.
- Sunlight: Ideally, choose a spot that gets some sunlight to help speed up the decomposition process. A shaded area is acceptable, but too much shade can slow down microbial activity.
- Drainage: Ensure the location has good drainage to prevent water from pooling around your compost bin.
Selecting the Type of Bin
There are various types of bins you can use for your coffee compost bin:
- Store-Bought Compost Bins: These are readily available in garden centers and come in various sizes. Tumbling bins are especially effective as they allow for easy mixing.
- DIY Bins: You can create a compost bin from wood pallets, old barrels, or plastic containers. Ensure proper airflow by leaving gaps or drilling holes in your DIY bin.
Layering Your Coffee Compost Bin
To achieve the best results from your coffee compost bin, it’s important to layer your materials effectively. Here’s how to do it:
Brown Materials: Start with a layer of brown materials like dry leaves, straw, or shredded paper. These materials are rich in carbon and help balance the nitrogen from the coffee grounds.
Green Materials: Next, add a layer of green materials, including coffee grounds, fruit and vegetable scraps, and grass clippings. Coffee grounds can make up about 10-20% of the total compost volume.
Mixing: After adding your layers, mix them gently to promote aeration and help the materials break down more evenly. This will speed up the composting process.
Maintaining Your Coffee Compost Bin
Once your coffee compost bin is set up, maintaining it is essential for successful composting. Here are some key aspects to consider:
Moisture Control
Your compost should be moist but not soggy. If it feels dry, add some water or extra green materials. If it’s too wet, incorporate more brown materials to absorb excess moisture. Aim for a moisture level similar to a wrung-out sponge.
Aeration
Regularly aerate your coffee compost bin by turning the pile every couple of weeks. This introduces oxygen, which is essential for aerobic bacteria that help break down the organic matter. A well-aerated bin will decompose faster and minimize odors.
Temperature Monitoring
Composting generates heat, which helps speed up the decomposition process. Your coffee compost bin should reach temperatures of 130°F to 160°F (54°C to 71°C). If the temperature drops significantly, it might indicate that the compost needs turning or additional nitrogen-rich materials.
Best Practices for Adding Coffee Grounds
Adding coffee grounds to your coffee compost bin can provide great benefits, but it’s important to do it correctly. Here are some best practices:
1. Use Used Coffee Grounds
Always use used coffee grounds in your compost. Fresh coffee grounds are highly acidic and can create an imbalanced pH in your compost. Used grounds are more neutral and safe to add.
2. Combine with Other Materials
To maintain a balanced compost pile, mix coffee grounds with other organic materials. Adding a variety of kitchen scraps, yard waste, and browns will ensure a healthy composting process.
3. Avoid Overloading
While coffee grounds are beneficial, adding too many can lead to an imbalance in your compost. Limit your coffee grounds to about 10-20% of the total compost volume. This will prevent excessive acidity and ensure a balanced nutrient profile.
Troubleshooting Common Issues in Your Coffee Compost Bin
Even with the best intentions, you may encounter some issues while maintaining your coffee compost bin. Here are some common problems and their solutions:
1. Odor Problems
If your coffee compost bin smells unpleasant, it’s likely due to too much nitrogen or insufficient aeration. To fix this, add more carbon-rich materials (browns) like dry leaves or shredded cardboard. Turn the pile to introduce air, which should help alleviate odors.
2. Slow Decomposition
If your compost is decomposing slowly, check the balance of green and brown materials. Make sure you have enough brown materials to support the nitrogen from the coffee grounds. Additionally, ensure that your bin is adequately aerated.
3. Pests and Critters
If your coffee compost bin attracts unwanted pests, such as flies or rodents, it may be due to too many food scraps or insufficient covering. Avoid adding meat or dairy products, and make sure to bury kitchen scraps beneath a layer of browns to deter pests.
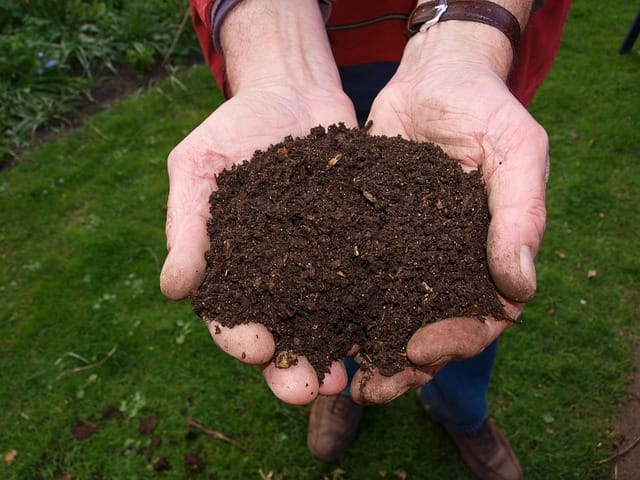
The Benefits of Using Coffee Compost in Your Garden
Once your coffee compost bin has produced nutrient-rich compost, you can start reaping the rewards in your garden. Here are some of the benefits of using this compost:
1. Enhances Soil Fertility
Coffee compost is loaded with nitrogen, phosphorus, and potassium, essential nutrients that plants need for healthy growth. Using this compost can lead to stronger plants, vibrant flowers, and improved fruit yields.
2. Promotes Beneficial Microbial Activity
Adding compost from your coffee compost bin helps promote a thriving ecosystem in your soil. Beneficial microbes and fungi break down organic matter, improving soil health and structure over time.
3. Acts as a Natural Pest Repellent
Interestingly, coffee grounds can help repel certain pests in the garden. Sprinkling coffee grounds around plants may deter slugs, snails, and some insects, providing a natural barrier to protect your crops.
Creative Uses for Coffee Grounds Beyond Composting
While a coffee compost bin is an excellent way to utilize coffee grounds, there are other creative ways to make the most of this resource:
1. Fertilizer Booster
Sprinkling coffee grounds directly onto the soil can provide a quick nutrient boost for your plants. Just be sure to mix them into the soil to avoid clumping.
2. Pest Repellent
You can use coffee grounds as a natural pest repellent by spreading them around plants in your garden. They can help deter ants, slugs, and snails.
3. Odor Neutralizer
Coffee grounds can absorb odors, making them useful for freshening up your refrigerator or as a natural deodorizer in your home. Place dried coffee grounds in an open container to help eliminate unwanted smells.
4. Cleaning Abrasive
Coffee grounds can act as a natural abrasive cleaner. Use them to scrub pots, pans, and surfaces to remove tough stains without using harsh chemicals.
Conclusion
Creating and maintaining a coffee compost bin is a rewarding endeavor that benefits both your garden and the environment. By recycling coffee grounds, you’re not only reducing waste but also enriching your soil with valuable nutrients. With the tips and practices outlined in this guide, you can effectively set up your coffee compost bin, troubleshoot any issues, and enjoy the many benefits of composting.
Incorporating coffee composting into your gardening routine is a step toward sustainability and healthier plant growth. As you continue to learn and adapt, you’ll find that a coffee compost bin can transform your gardening experience, allowing you to grow thriving plants while contributing to a more sustainable planet.