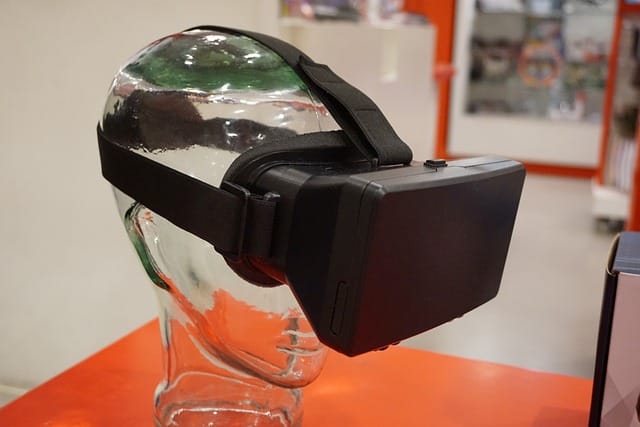
In recent years, virtual reality (VR) has gained significant traction, offering immersive experiences that can transport users to entirely new worlds. While high-end VR headsets like the Oculus Rift or HTC Vive can be pricey, creating a DIY virtual reality headset is not only more budget-friendly but also a fun and educational project. Whether you’re a tech enthusiast, a gamer, or someone curious about VR technology, building your own headset can be incredibly rewarding. In this guide, we’ll take you through the steps necessary to create your very own DIY virtual reality headset.
Understanding Virtual Reality
What is Virtual Reality?
Virtual reality is a computer-generated environment that simulates real or imagined worlds, allowing users to interact within those environments in a seemingly real or physical way. VR typically involves a headset with two lenses that create a stereoscopic 3D effect, paired with motion sensors to track the user’s movements.
The Importance of a DIY Approach
The rise of DIY culture has made technology more accessible. By building your own DIY virtual reality headset, you can tailor it to your specific needs and preferences while also gaining a deeper understanding of the components involved. This process encourages creativity and problem-solving, making it an enriching experience.
Step 1: Gather Your Materials
Before diving into the construction process, it’s crucial to gather all the necessary materials. Here’s a list of what you’ll need to create your DIY virtual reality headset:
Required Materials
- Smartphone: A device with a good display and motion sensors (gyroscope and accelerometer).
- Lenses: Fresnel or biconvex lenses that provide the necessary magnification.
- Cardboard or Foam: To construct the headset frame.
- Velcro Straps: For securing the headset to your head.
- Glue: Hot glue or super glue for assembling the parts.
- Cutting Tools: Scissors or a craft knife for shaping the cardboard or foam.
- Ruler and Pencil: For measuring and marking dimensions accurately.
Optional Materials
- 3D Printer: If you have access to one, you can print custom parts for a more polished look.
- Headphones: For an immersive audio experience.
- Adjustable Head Straps: For better comfort and fit.
Step 2: Designing Your Headset
Planning Your Build
Before cutting any materials, sketch out a design for your DIY virtual reality headset. This will help visualize the size and shape of the headset and ensure all components fit together properly.
Dimensions
The size of your headset will largely depend on the size of your smartphone. Ensure that your design accommodates your device while allowing enough space for the lenses.
Step 3: Cutting and Shaping the Cardboard
Creating the Frame
Using your ruler and pencil, measure and mark the dimensions for the frame of your DIY virtual reality headset on the cardboard. You will need to cut out two pieces that will form the front and back of the headset.
Cutting Lenses Holes
Cut out circular holes in the front piece for the lenses. Ensure the holes are the right size to fit the lenses snugly. This step is crucial as improper placement can affect the clarity and immersion of your VR experience.
Step 4: Inserting the Lenses
Choosing the Right Lenses
Selecting the right lenses is critical for a successful DIY virtual reality headset. Fresnel lenses are popular due to their lightweight nature and ability to focus light effectively.
Securing the Lenses
Insert the lenses into the holes you cut out earlier. Use glue to secure them in place. Ensure they are aligned properly to maximize the viewing experience.
Step 5: Assembling the Headset
Attaching the Front and Back Pieces
Once the lenses are secured, glue the front and back pieces of the headset together. Ensure that the headset forms a box-like structure, which will house your smartphone.
Adding Ventilation
It’s a good idea to include ventilation holes in your design to prevent your smartphone from overheating during use. These holes can be cut into the sides or bottom of the headset.
Step 6: Creating the Smartphone Holder
Crafting a Secure Space
To hold your smartphone in place, create a holder using additional pieces of cardboard or foam. Ensure this holder is adjustable to accommodate different smartphone sizes.
Securing the Holder
Glue the holder into the back of the DIY virtual reality headset, ensuring it’s firmly attached but easy to remove when you want to switch devices.
Step 7: Adding Comfort Features
Padding for Comfort
To enhance comfort during prolonged use, consider adding foam padding around the edges of the headset. This will make it more comfortable against your face and help with the overall fit.
Adjustable Straps
Use Velcro straps to create a secure fit. This allows you to adjust the headset according to your head size, providing a snug but comfortable experience.
Step 8: Testing Your DIY Virtual Reality Headset
Choosing VR Apps
Before diving into the world of virtual reality, download a few VR apps or games on your smartphone. There are plenty of options available, ranging from educational experiences to immersive games.
Conducting Tests
Put on your DIY virtual reality headset and insert your smartphone into the holder. Test various apps to ensure everything works as expected. Pay attention to the clarity of the lenses and the overall comfort of the headset.
Step 9: Troubleshooting Common Issues
Adjusting Lens Position
If the image appears blurry, you may need to adjust the position of the lenses. Minor tweaks can significantly enhance the visual quality.
Ensuring Proper Fit
If the headset is uncomfortable, recheck the padding and strap adjustments. Ensuring a proper fit is essential for a fully immersive experience.
Step 10: Enhancing Your DIY Virtual Reality Headset
Adding Extra Features
Once you have successfully built your DIY virtual reality headset, consider adding extra features for an enhanced experience:
- Headphones: For an immersive audio experience, attach headphones or use Bluetooth for wireless sound.
- External Controllers: Integrate VR controllers for a more interactive experience.
- Decorate Your Headset: Personalize your headset with paint, stickers, or other creative designs.
Experimenting with Different Lenses
If you’re looking to improve the visual experience further, consider experimenting with different lenses. Biconvex lenses may provide a different effect compared to Fresnel lenses, allowing you to customize your DIY virtual reality headset even more.
Understanding the Basics of Virtual Reality Technology
How Virtual Reality Works
Understanding the core principles behind virtual reality technology will enhance your DIY experience. VR relies on specific components that work together to create an immersive environment:
- Display: The screen shows the virtual environment, usually a smartphone or a dedicated VR display.
- Lenses: They focus and magnify the images on the display, creating a 3D effect.
- Sensors: Motion sensors track your head movement, allowing you to look around in the virtual environment as if you were physically there.
The Role of Software in VR
The software is crucial in creating the virtual environment. Many VR applications and games are designed to be compatible with various types of headsets, including DIY models. Look for software that can be easily adjusted to fit your setup.
Exploring Various VR Applications
Types of VR Applications
There is a wide range of applications you can explore once you have your DIY virtual reality headset ready:
- Gaming: Experience immersive games where you can physically interact with the environment.
- Education: Many educational apps provide immersive learning experiences in subjects like science, history, and art.
- Travel: Explore virtual tours of famous landmarks and locations around the world.
Recommended Apps for Your DIY Headset
- Google Cardboard: A great starting point with various VR experiences available.
- YouTube VR: Watch 360-degree videos for a fully immersive viewing experience.
- Tilt Brush: Create 3D art in a virtual space, enhancing your creativity.
Community and Resources for DIY VR Enthusiasts
Online Communities
Joining online communities can greatly enhance your DIY journey. There are many forums and groups where you can share your experiences, get advice, and find inspiration for new projects.
- Reddit: Subreddits like r/DIY and r/virtualreality are great places to connect with like-minded enthusiasts.
- Facebook Groups: Join groups focused on VR technology, DIY projects, and gaming.
Tutorials and Guides
In addition to this guide, many resources are available online that provide additional tips, tricks, and tutorials for building and improving your DIY virtual reality headset.
- YouTube: Search for video tutorials that can provide visual guidance throughout the building process.
- Instructables: A platform dedicated to DIY projects where you can find detailed instructions and user experiences.
Future Trends in Virtual Reality
Emerging Technologies
The VR landscape is continually evolving, with new technologies enhancing the user experience. Here are some trends to watch:
- Wireless VR: As technology advances, expect more wireless options that eliminate the need for cumbersome cords.
- Augmented Reality (AR): Blending virtual and real-world elements to create more interactive experiences.
- Improved Motion Tracking: More advanced tracking technologies are being developed, allowing for even more immersive experiences.
Opportunities for DIY Enthusiasts
As VR technology advances, there will be numerous opportunities for DIY enthusiasts to create their own innovations. Whether it’s designing new types of headsets, developing custom software, or creating new applications, the possibilities are vast.
Conclusion: Enjoy Your DIY Virtual Reality Experience!
Creating your own DIY virtual reality headset can be a fun and fulfilling project. By following these steps, you’ll gain a deeper understanding of the technology behind VR while enjoying immersive experiences tailored to your preferences. Plus, you can take pride in knowing you built your headset from scratch!
As technology advances, the possibilities for what you can do with VR are limitless. So put on your headset, dive into virtual worlds, and let your imagination run wild!
Final Thoughts
Building a DIY virtual reality headset is not just about the finished product; it’s about the journey of learning and creating. As you explore virtual reality, remember to embrace creativity, share your knowledge, and encourage others to explore the fascinating world of VR. Whether you’re using your headset for gaming, education, or creative projects, the experiences you’ll have will be well worth the effort.