As the world moves towards sustainable energy solutions, many homeowners are exploring ways to harness renewable resources. One effective approach is to create a DIY solar water heater. This system allows you to take advantage of solar energy, significantly reducing your utility bills and minimizing your carbon footprint. Whether you’re looking to heat water for domestic use, swimming pools, or gardening, a DIY solar water heater can meet your needs without the heavy costs associated with professional installations.
Building your own DIY solar water heater is not only a practical solution but also a fulfilling project that offers insights into solar technology. In this article, we will guide you through ten detailed steps to successfully create your solar water heating system. We’ll cover everything from planning and gathering materials to installation and maintenance, ensuring that your system operates efficiently and effectively.
In the following sections, we will delve into the essential components of a DIY solar water heater and provide tips and tricks to enhance its performance. By the end of this guide, you’ll be equipped with the knowledge and skills needed to embark on your own solar water heating journey, contributing to a greener future.
1. Understanding Solar Water Heating Technology
Before embarking on your DIY solar water heater project, it’s crucial to understand how solar water heating systems function. Solar water heaters use solar collectors to absorb sunlight, converting it into heat, which is then transferred to water. The basic components of a solar water heater include:
1.1 Solar Collectors
Solar collectors are the heart of the DIY solar water heater. They capture sunlight and convert it into heat. There are two primary types of collectors:
- Flat-Plate Collectors: These are the most common type used in residential systems. They consist of a dark-colored absorber plate, insulated backing, and a transparent cover that helps trap heat.
- Evacuated Tube Collectors: These are more efficient but also more expensive. They consist of multiple glass tubes, each containing an absorber that collects solar energy.
1.2 Storage Tank
The storage tank is where the heated water is held until needed. In a DIY solar water heater, it is essential to select a well-insulated tank to minimize heat loss.
1.3 Circulation System
The circulation system is responsible for moving water between the collectors and the storage tank. It can be either passive or active:
- Passive Systems: These rely on gravity and natural convection to circulate water. They are generally simpler and less expensive but may not be as efficient.
- Active Systems: These use pumps to circulate water, making them more effective in colder climates.
1.4 Controls
Controls regulate the system’s operation, ensuring the water is heated to the desired temperature and preventing overheating.
Understanding these components will help you make informed decisions when designing and building your DIY solar water heater.
2. Planning Your DIY Solar Water Heater
2.1 Assessing Your Water Heating Needs
Before you start building, evaluate your hot water needs. Consider factors such as:
- Household Size: How many people will be using the hot water?
- Usage Patterns: What are the peak times for hot water usage in your home?
- Geographic Location: The amount of sunlight your area receives will influence the system’s effectiveness.
2.2 Determining the Size of Your System
Based on your assessment, you can determine the appropriate size of your DIY solar water heater. A general rule of thumb is to allocate 20 gallons of storage per person in your household.
2.3 Evaluating Your Site
Choosing the right location for your DIY solar water heater is crucial for maximizing sunlight exposure. Consider:
- Orientation: Ideally, the collectors should face south (in the Northern Hemisphere) to receive the most sunlight.
- Obstructions: Avoid locations with trees, buildings, or other obstructions that may block sunlight.
2.4 Budgeting
Set a budget for your DIY solar water heater project. Factor in the costs of materials, tools, and any potential professional help you may need. A well-planned budget will help ensure that you stay on track throughout the project.
3. Gathering Materials for Your DIY Solar Water Heater
3.1 Essential Materials
Here’s a list of materials you’ll need to build your DIY solar water heater:
- Solar Collectors: Either flat-plate or evacuated tube collectors.
- Storage Tank: An insulated water tank with adequate capacity.
- Pipes and Fittings: For connecting the collectors to the tank and for circulation.
- Pump: If you choose an active system.
- Thermostat and Controls: To regulate the system.
- Insulation Materials: For the storage tank and pipes to reduce heat loss.
3.2 Tools Required
You’ll need some basic tools to complete your DIY solar water heater project:
- Drill and Drill Bits: For making holes in the tank and collectors.
- Wrenches and Screwdrivers: For assembling components.
- Saw: For cutting pipes and other materials.
- Measuring Tape: To ensure accurate dimensions.
- Safety Gear: Gloves and goggles to protect yourself during construction.
Gathering these materials in advance will streamline your building process and ensure that you have everything you need at hand.
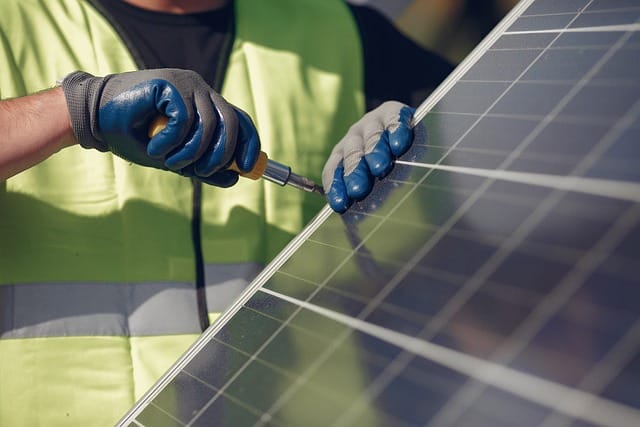
4. Building the Solar Collectors
4.1 Flat-Plate Collector Construction
If you choose to build flat-plate collectors for your DIY solar water heater, follow these steps:
- Build the Frame: Construct a rectangular frame using wood or metal. Ensure it’s sturdy enough to support the weight of the collector.
- Create the Absorber Plate: Use a piece of black metal, such as aluminum or copper, to absorb heat. The black color maximizes heat absorption.
- Insulation: Line the back of the frame with insulation material to minimize heat loss.
- Cover the Collector: Use a transparent material like tempered glass or polycarbonate to cover the front of the collector. This helps to trap heat while allowing sunlight in.
- Attach the Collector to the Frame: Secure the absorber plate to the frame, ensuring it is tightly sealed against the insulation.
4.2 Evacuated Tube Collector Construction
If you prefer evacuated tube collectors, consider the following steps:
- Purchase Pre-Made Tubes: Evacuated tubes can be purchased from suppliers or online. They are generally more efficient but may require a higher initial investment.
- Mount the Tubes: Follow the manufacturer’s instructions to install the tubes securely in the collector frame.
- Connect the Tubes: Use piping to connect the tubes to the storage tank, ensuring all fittings are secure to prevent leaks.
5. Installing the Storage Tank
5.1 Selecting the Right Location
Choose a location for your storage tank that is close to the solar collectors for efficient water transfer. The tank should also be protected from freezing temperatures if you live in a cold climate.
5.2 Setting Up the Tank
- Mount the Tank: Securely mount the tank on a sturdy platform. Make sure it is elevated to facilitate gravity flow in passive systems.
- Insulate the Tank: Wrap the tank with insulation material to prevent heat loss.
- Install Pipes: Connect the inlet and outlet pipes from the solar collectors to the storage tank, ensuring they are securely fitted.
5.3 Ensuring Water Supply
Make sure you have a reliable water supply connected to the tank. This may involve installing a valve or fitting that allows for easy filling.
6. Installing the Circulation System
6.1 Passive vs. Active Systems
Decide whether you want a passive or active circulation system for your DIY solar water heater.
- Passive Systems: Generally easier to install, relying on gravity and natural convection. They require less maintenance but may not be as efficient in colder climates.
- Active Systems: Require pumps to circulate water but offer better performance. You’ll need to install a thermostat to control the pump’s operation.
6.2 Installing the Circulation Pump (If Applicable)
- Choose a Suitable Pump: Select a pump that is compatible with your system and can handle the required flow rate.
- Install the Pump: Follow the manufacturer’s instructions to install the pump between the solar collectors and the storage tank. Ensure all fittings are watertight to prevent leaks.
6.3 Connecting the Circulation System
Connect the circulation pipes to the solar collectors and the storage tank, ensuring that they are correctly routed for optimal water flow.
7. Setting Up Controls
7.1 Thermostat Installation
If you are using an active circulation system, installing a thermostat is crucial for regulating water temperature.
- Select a Thermostat: Choose one designed for water heating applications.
- Install the Thermostat: Place it in the storage tank according to the manufacturer’s instructions. This device will monitor the water temperature and activate the pump as needed.
7.2 Additional Controls
Consider adding timers or smart controls that can optimize operation based on time of day or expected solar intensity. This can further enhance the efficiency of your DIY solar water heater.
8. Testing Your DIY Solar Water Heater
8.1 Initial Testing
Before full-scale operation, conduct an initial test to ensure everything is functioning correctly.
- Check for Leaks: Inspect all connections for leaks, and fix any issues before proceeding.
- Run the System: Activate the pump and observe the water flow from the collectors to the storage tank.
8.2 Monitoring Performance
Monitor the temperature of the water in the storage tank over several sunny days. Ensure that the system effectively heats the water to the desired temperature.
9. Maintenance Tips for Your DIY Solar Water Heater
9.1 Regular Inspections
Regularly inspect your DIY solar water heater for any signs of wear or damage. Check for leaks, corrosion, and ensure that the collectors are free from debris or dirt.
9.2 Cleaning the Collectors
Keep the solar collectors clean to maximize their efficiency. Remove any dust or debris that may have accumulated on the surface.
9.3 Seasonal Adjustments
If you live in a region with seasonal changes, consider adjusting the angle of the solar collectors to optimize sun exposure throughout the year.
Conclusion
Creating a DIY solar water heater is an excellent way to embrace renewable energy, reduce utility costs, and contribute to environmental sustainability. By following the detailed steps outlined in this guide, you can build an effective and efficient solar water heating system tailored to your needs.
Remember that the key to success is careful planning, quality construction, and regular maintenance. By investing time and effort into your DIY solar water heater, you’ll enjoy the benefits of clean, renewable energy for years to come.