When it comes to photography composition, understanding the golden triangle is essential for creating visually appealing images. The golden triangle is a compositional technique that divides the frame into four distinct sections using two diagonal lines, intersecting at a point of interest. This technique can guide the viewer’s eye through the photograph, creating a sense of balance and harmony. In this comprehensive guide, we will explore the golden triangle, its significance in photography, and practical tips for using it effectively in your work.
Understanding the golden triangle can elevate your photography skills, helping you capture breathtaking landscapes, striking portraits, and captivating street scenes. By learning how to apply this compositional rule, you will enhance your ability to create images that resonate with viewers. Let’s delve into the world of the golden triangle and unlock its potential for your photography journey.
Understanding the Golden Triangle
To grasp the concept of the golden triangle, it’s essential to first understand its origins and theoretical basis. The golden triangle derives from the classic rule of thirds, which is a popular guideline for framing photographs. However, while the rule of thirds divides the frame into equal sections, the golden triangle introduces a dynamic element to composition.
The Basics
The golden triangle involves drawing two diagonal lines from opposite corners of the frame, creating a triangular shape. The two lines divide the image into three sections, forming a larger triangle. This method provides a framework for placing key elements within your composition, allowing for a more engaging visual narrative.
The intersection points of the diagonal lines serve as ideal spots to position your subject or point of interest. By strategically placing important elements at these points, you can guide the viewer’s gaze throughout the image, leading them from one area of interest to another.
How this Differs from Other Compositional Rules
While the golden triangle shares similarities with other compositional techniques like the rule of thirds and the Fibonacci spiral, it offers a unique perspective on balance and movement. Here’s how it differs:
Rule of Thirds: The rule of thirds divides the frame into nine equal sections, placing points of interest at the intersections. This technique is effective but can sometimes create static images. The golden triangle introduces diagonal lines, which add a sense of motion and direction.
Fibonacci Spiral: The Fibonacci spiral is a mathematical concept that suggests a natural progression within composition. It can create visually appealing images, but it may not be as straightforward for beginners as the golden triangle.
The golden triangle combines the best of both worlds, providing a simple yet effective guideline for capturing dynamic and harmonious images.
Why Use this in Photography?
Incorporating the golden triangle into your photography can significantly enhance the overall quality of your images. Here are some compelling reasons to utilize this compositional technique:
Enhances Visual Interest
The golden triangle creates a sense of tension and movement within your composition. By strategically placing elements within the triangular framework, you can lead the viewer’s eye through the photograph, encouraging them to explore every detail.
Promotes Balance
By using the golden triangle, you can achieve a sense of balance and harmony in your images. This compositional technique ensures that no single element overpowers the others, creating a cohesive visual experience.
Offers Creative Flexibility
The golden triangle is a versatile technique that can be applied to various genres of photography. Whether you’re capturing landscapes, portraits, or still life, the golden triangle can help you create striking compositions that stand out.
Encourages Experimentation
Mastering the golden triangle encourages photographers to think critically about composition and to experiment with different angles and perspectives. This experimentation can lead to unique and captivating images that push the boundaries of traditional photography.
How to Implement this methodology in Your Photography
Now that we understand the golden triangle’s significance, let’s explore practical tips for incorporating it into your photography.
Step 1: Familiarize Yourself with the Concept
Before you start shooting, take some time to familiarize yourself with the golden triangle concept. Look at various images and analyze how photographers have utilized this technique. Consider creating a mental checklist of the elements you want to incorporate in your own work.
Step 2: Visualize the Triangle in Your Frame
When you’re on location or setting up a shot, visualize the golden triangle in your frame. Imagine drawing the diagonal lines and identifying the key areas where your subject or focal point can be placed. This visualization will help you compose your image effectively.
Step 3: Experiment with Angles
Don’t be afraid to move around and change your perspective. Experimenting with different angles can yield varied results, and you may discover compositions that you hadn’t initially considered. Take your time to explore the scene and find the most engaging angle.
Step 4: Utilize Leading Lines
Incorporating leading lines into your composition can enhance the effectiveness of the golden triangle. Leading lines draw the viewer’s eye towards your subject, creating a stronger visual impact. Look for natural lines in the environment, such as roads, rivers, or architectural features, to guide the viewer’s gaze.
Step 5: Be Mindful of the Background
The background plays a crucial role in your composition. A cluttered or distracting background can detract from the subject, so take care to position your subject against a clean, complementary background. The golden triangle can help you frame your subject against the background in a way that enhances the overall composition.
Step 6: Review and Edit
Once you’ve captured your images, take time to review them and assess how effectively you’ve applied the golden triangle. Use photo editing software to enhance your compositions further, adjusting crop and exposure as needed to achieve the desired effect.
Common Mistakes to Avoid
As with any compositional technique, it’s essential to be aware of common pitfalls when applying the golden triangle. Here are some mistakes to avoid:
Overcrowding the Frame
While it’s important to include multiple elements in your composition, overcrowding the frame can lead to confusion. Ensure that each element serves a purpose within the composition and that the viewer’s eye can easily navigate the image.
Ignoring the Background
The background is just as important as the foreground. A busy or distracting background can diminish the impact of your subject. Take the time to assess the background before shooting and consider how it complements or contrasts with your subject.
Relying Solely on the Technique
While the golden triangle is a valuable compositional tool, relying solely on it can lead to repetitive images. Use it as a guide, but don’t hesitate to break the rules and experiment with other techniques. Finding your unique style will ultimately set your work apart.
Advanced Techniques: Combining the methodology with Other Rules
Once you’re comfortable with the golden triangle, consider combining it with other compositional techniques for even more dynamic results.
Using the Rule of Thirds
The golden triangle and rule of thirds can work hand in hand. While placing your subject according to the golden triangle, also ensure it aligns with the rule of thirds for added balance. This combination can create engaging compositions that draw viewers in.
Incorporating the Fibonacci Spiral
The Fibonacci spiral can complement the golden triangle by guiding the viewer’s eye along a natural path within the composition. As you position your subject within the triangle, consider how elements can flow in a spiral, creating a harmonious connection throughout the image.
Exploring Symmetry and Asymmetry
This lends itself well to both symmetrical and asymmetrical compositions. Experiment with symmetrical arrangements for a balanced look, or use asymmetrical placement to create tension and interest. This versatility allows you to adapt the golden triangle to various styles and genres.
The Role of Light and Color in Golden Triangle Compositions
While composition is crucial, the interplay of light and color also significantly influences your images. Here’s how to consider these elements within the context of this.
Understanding Light Direction
The direction of light can dramatically impact your composition. Side lighting can create depth and dimension, while backlighting can produce striking silhouettes. Consider how light interacts with the elements within your golden triangle composition to enhance the overall impact.
Utilizing Color Theory
Color theory can enhance your compositions by guiding viewers’ emotions and perceptions. Using complementary colors within the triangle can create a striking contrast, while analogous colors can evoke a sense of harmony. Pay attention to color relationships as you compose your image.
Experimenting with White Balance
Adjusting the white balance can alter the mood of your photographs. Warm tones can create a cozy atmosphere, while cooler tones may convey a sense of calm. Experiment with different white balance settings to find the right emotional tone for your golden triangle compositions.
Examples of Successful Golden Triangle Photography
To further inspire your understanding of the golden triangle, let’s explore some examples of successful images that effectively utilize this compositional technique.
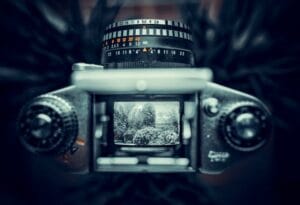
Landscape Photography
In landscape photography, this can enhance the natural beauty of the scene. Imagine a mountain range, with one peak positioned at a point of interest within the triangle, and leading lines created by a winding river or path guiding the viewer’s gaze toward it. The resulting composition draws the eye into the landscape, creating a sense of depth and exploration.
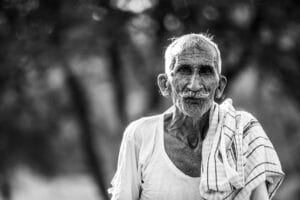
Portrait Photography
In portrait photography, the golden triangle can guide how you position your subject. For example, if you’re capturing a person standing against a textured wall, you might align their eyes along the top diagonal line of the triangle, creating a strong focal point. The remaining elements in the background can complement the subject without overwhelming them.
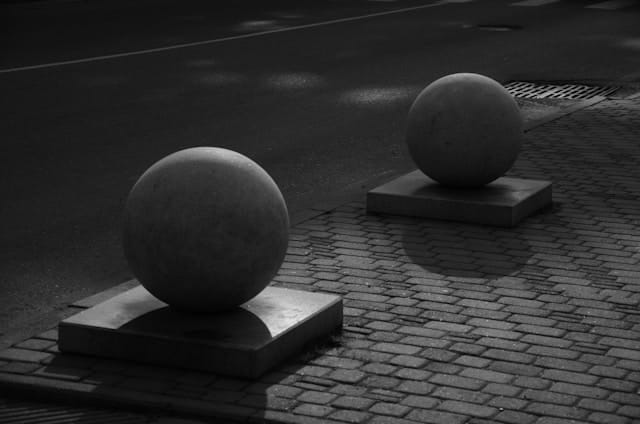
Street Photography
Street photography benefits from the dynamic movement of the golden triangle. By capturing candid moments with subjects positioned according to the triangle, you can create images that tell a story while leading the viewer’s eye through the composition. Look for moments where action or interaction occurs within the triangular framework.
Conclusion
Mastering the golden triangle is an invaluable skill for photographers seeking to create engaging and visually striking images. By understanding the technique, implementing it in your compositions, and avoiding common pitfalls, you can elevate your photography to new heights.
Remember that while the golden triangle is a powerful tool, it should serve as a guide rather than a rigid rule. Embrace experimentation and exploration as you develop your unique photographic voice. Each photo you capture is an opportunity to learn and grow, so don’t shy away from pushing the boundaries of composition.
As you continue your photography journey, let the golden triangle inspire you to create images that captivate and resonate with your audience.